See other HELPs w/the TOPIC "Email Manage"
Go to Help Category "Email Manage"

FAQ at www.webs-a-gogo.com Staff Only. Thank You! "Create a Mail List"
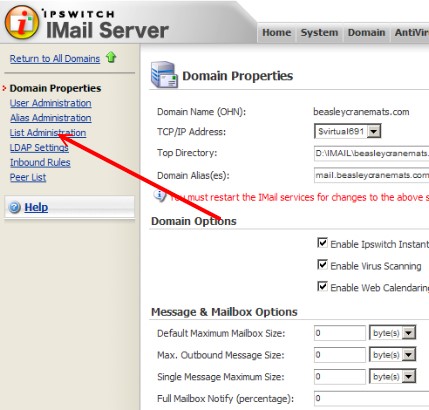
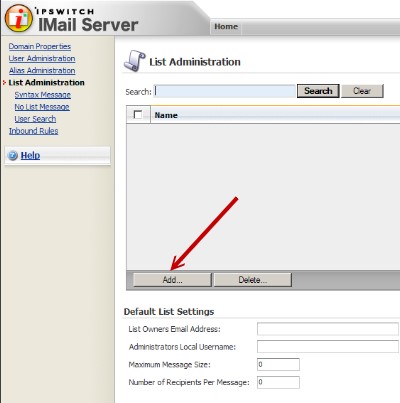
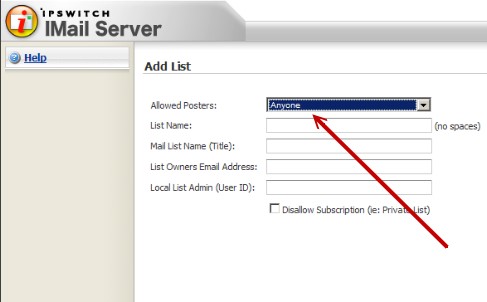
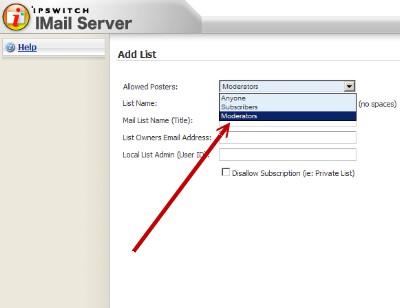
Category: Email Manage
Help Details - Webs-a-gogo Online Training System (OTS)


Dept:      Category:  
Help Category: Email Manage   |    Help ItemNo:  0903091254
Help Details: Create a Mail List

Click on your "Staff" button link and at the Admin Login Page enter your User ID and Password in the Web-Based Email Login section.
Alternatively, from the Control Center click on the Mail Admin icon
and enter your "username@yourdomain" and password.
Either method gets you to your email inbox
On the upper-right side of the mailbox you'll see your username and a Text Link entitled Web Admin. Click the Web Admin link
Then click on the List Administration Text Link
For the purpose of instruction, we will be using ficticious information to create our new list.

Our Domain Name is: mydomain.com
Our List Owner (Admin User ID) will be: ListOwner
List Owner Email Address will be: listowner@mydomain.com
List Name: NewList
List Title: Our New List


Click the ADD... Button
Click the Allowed Posters dropdown
Select Moderators. This allows only moderators (you) to post messages to the list.
Type in the name of your list in the List Name field. You will use this name when you send emails to your subscriber list. example: newlist@mydomain.com
 
Type in your List Title. This title can be anything you want to identify your new list.
 
In the List Owners Email Address field enter the list owner's email address.  This is the mail account from which all list emails must be sent from and is also the account that any replies to a list email will return to.  NOTE: If you don't want to receive list email replies to your primary email address, we suggest you create a "dummy" account for the list owner.  Click HERE to view the Webs-a-gogo HELP for Creating Mail Accounts.

 
Click the Save button
Your new list now appears in the List Administration pane.
 
Click the Save button.
Now click on the Security text link
This brings you to the List Security page. Using the Allow Posting By dropdown select who can post to this list.

Make sure you select: Moderators
1. Check the Disable List Command box
 
2. Check the Use Password box
 
2. Create a list password in the Password field
 
3. Click the Save button
Now go back to your Control Center and click on the Site SEO & Identity Icon
(1) Now scroll to the bottom right of the page and enter the newly created mail list name in the Mail List 1 Name field. The Subscribe Press Article uses this information to add users to your mailing list.  
(2) Enter the List Owner email address that you used when you created the list
 
(3) Enter the password which you created for the mailing list
 
(4) Click the Save Changes button


Learn how to use your mailing list by clicking on the Help Reference link at the bottom of the page or by clicking here.
 
 
You may also manually add users to your mailing list. Click here to view the HELP relating to that topic.


Last Modified:
10/19/2009     Date Entered 9/3/2009

Additional Resources
• Help File Reference
• Sales/Service
• Tech Support