Almost every feature of your site includes a Picture Uploader. Its use in each feature is explained in detail in that feature's HELP file. This is a general overview of its use. There are several rules which must be observed in order for your picture uploads to be successful. They are:
|
1. Unique Picture Name: All picture names must be unique. If you upload two pictures by the same name, then the first one will be over-written with the image of the second one. Also picture names should be meaningful for Search Engine Optimization. Always try to name your pics before upload with a good keyword name. Example: if I'm selling bikes, I would name a picture something like Schwinn 12 speed bicycle instead of the picture name that my Sony camera assigns it.
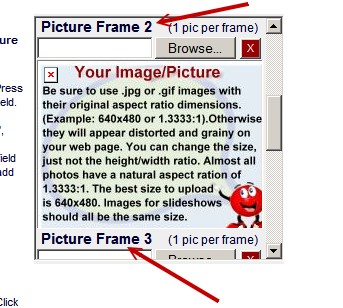
2. Picture Frame: The picture upload frames as described below must be used starting at picture frame 1 and move up from there to Frame 2, 3 and so on. You cannot have gaps with empty frame in lower frame numbers. Example: If you have 3 pics and decide later to delete picture frame 1, you must move picture frame 2 and 3 up to the picture frame 1 and 2 position. The code on the display pages always looks first to see if picture frame 1 has a pic, if it does not, then it abandons the call and will not look to the next frame. Likewise, if you have 3 pics in frames 1, 2 and 3, then the code will find picture frame 4 empty and abandon calls for higher numbered frames. So, the rule of thumb is to always have your pics filling up the lower numbered frames leaving empty picture frames after your filled frames.
3. Picture File Extensions: All pictures must be one of four allowed extensions for the web. They are:
1) .jpg
2) .jpeg
3) .gif
4) .png
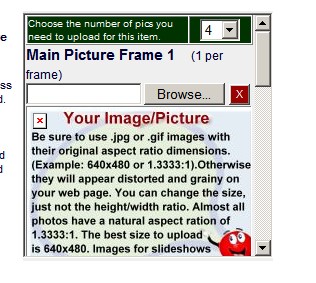
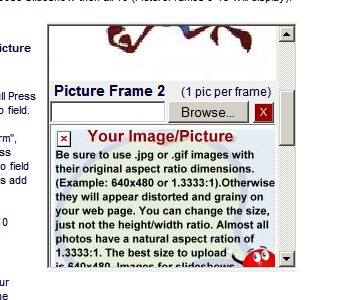
4. Picture Size: All pictures should be at least 640 pixels wide before upload to prevent grainy look on enlarge. If you upload a small picture, it will look terrible and grainy when enlarged. Start with big pic to prevent this. Our picture uploader will resize and re-sample your large pics into multiple sizes and smaller file byte sizes for quick loading. |
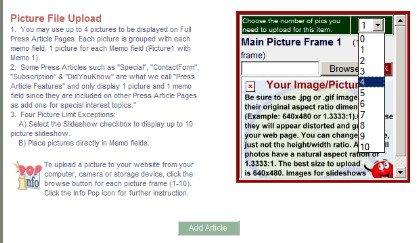 |
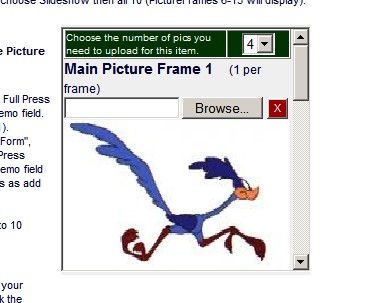
Begin by selecting the number of pictures you want to upload. Different features allow different numbers of pictures: |
 |
This will give you a separate frame for each picture: |
|
|
Begin with Picture Frame 1:
>> Click the Browse button |
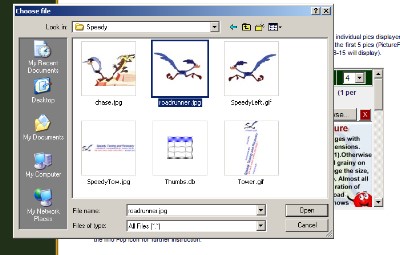 |
The browser will automatically open your My Pictures folder, but you can browse to any location your pictures reside. Select the picture you want to upload and press the Open button: Be sure to select a picture file with one of the following extensions. These four file types are the only kind of picture/image file we can use:
1) .jpg
2) .gif
3) .jpeg
4) .png |
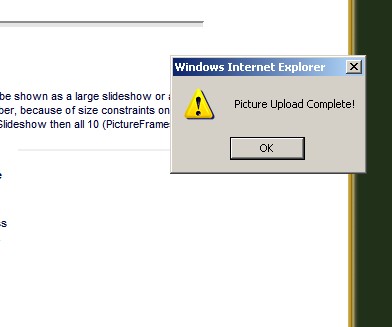 |
WAIT for the upload to complete. When it does a Picture Upload Complete applet will appear. Click OK: |
 |
Your picture will appear in the Frame.
NOTE: In some cases, depending on your computer and your Internet browser, the uploaded picture might not appear after upload is complete. If this is the case with your system, don't worry. As long as you selected one of the four picture file types listed above, and, your got the PopUp stating that "Picture Upload Complete", then you should be fine. When you come back into edit mode and check, you will find the picture is in the frame as it should be.
|
 |
Scroll to the next frame and repeat the process until you've uploaded the number of pictures you selected from the Picture Number dropdown:
ALWAYS remember to click the Save Changes button after you've made changes to pages, this INCLUDES uploaded pictures. |